|
|
|
WINDOWS NT EXPLORER INTRODUCTION
BASIC ACTIONS
MINIMIZE AND MAXIMIZE WINDOWS
1. TO MAXIMIZE > double-click the blue title bar

2. TO MINIMIZE > click on the left top-right button

3. TO MAKE WINDOW SMALLER > click on the middle top-right button (you can only do that if the window is maximized = full screen)

MOVING WINDOWS AROUND THE SCREEN
1. TO MOVE AROUND > drag (hold left mouse button) the blue title bar and drop it where you want the window to be
RESIZING A WINDOW
1. TO RESIZE > drag-and-drop the bottom right corner of the window to a desired size

MOUSE ACTIONS
1. CLICK > click left button once
2. DOUBLE CLICK > click left-button twice (fast)
3. RIGHT CLICK > click right button once
4. DRAG-AND-DROP > click-and-hold left button and move mouse
USING WINDOWS NT EXPLORER
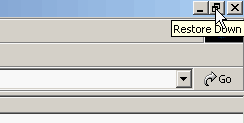
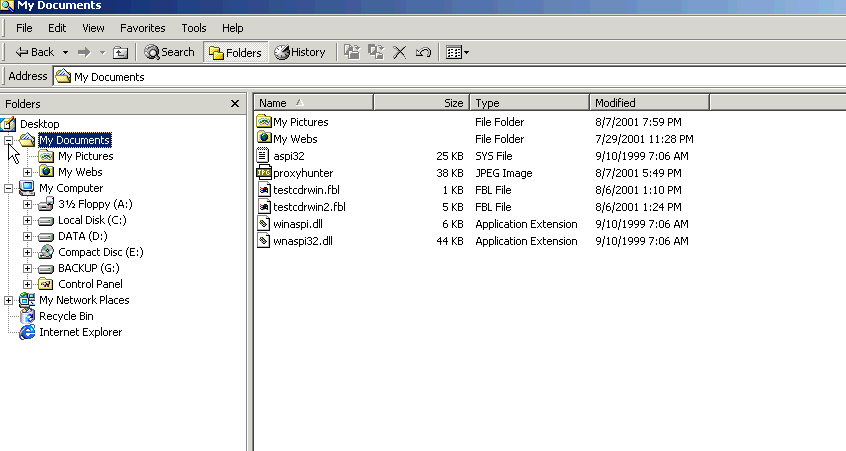
USING THE TITLE AND STATUS BARS (see top of this page for pictures)
The blue bar on top of the windows is called TITLE BAR > title bar gives the location of the place (on the computer) that is explored and program name
On the right corner of TITLE BAR are 3 icons for MINIMIZING, MAKE SMALLER, and MAXIMIZING the window
Bottom bar is called STATUS BAR > gives info about the object you selected
MENU BAR gives access to menus
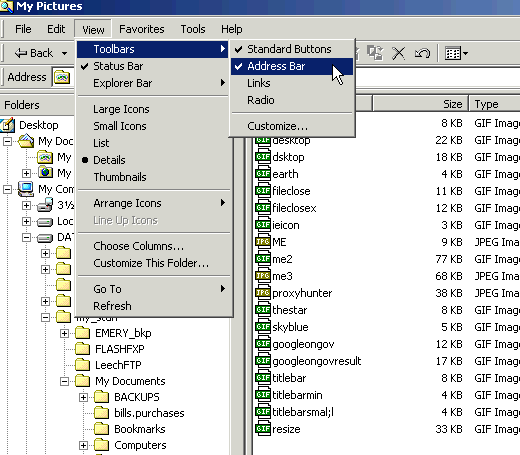
USING THE ‘VIEW’ MENU
Make sure Toolbar is always selected (checked)
Make sure Details is always selected
The buttons in the Toolbar make it easier to give commands to computer

TOOLBAR BUTTONS
Toolbar makes it easy to do something. For example, if user wants to delete a file he would select that file and click on the ‘X’ button on the toolbar
All of the buttons can also be found somewhere in the five menus => File, Edit, View, Tools, Help
List buttons (the 4 buttons on the right) give different view of the contents. Always use Details button.
The buttons on the left are for copy, cut and paste and one for delete. (Don’t delete until you are absolutely sure of this)
NOTE:
(I) EVERYTHING YOU DELETE FROM DRIVE ‘C’ OR ‘D’ (HARD DRIVE) GOES INTO THE RECYCLE BIN AND CAN BE RESTORED LATER
(ii) EVERYTHING YOU DELETE FROM DRIVE ‘A’ ( FLOPPY DRIVE) WILL BE LOST FOREVER!!!
FLOPPY DISKS
Floppy ‘A’ (FLOPPY DRIVE) can be found in the left window of NT Explorer
Every icon or folder in the left window can be expanded or collapsed if it has a ‘+’ or ‘-‘ or a picture to the left of it. ‘+’ or ‘-‘ mean there are more folders inside
User can only find all the contents of a folder by selecting it in the left window and looking at the contents of the right window.
Activity1 (room 301 only) => find the contents of the ‘Basktbal’ folder that’s inside ‘Sports’ folder that’s inside ‘Clipart’ folder on ‘Drive C:’
(how many files are there? how many folders?)
Activity2 (room 301 only) => how many folders are there inside the ‘Space’ folder that’s found inside ‘Clipart’ folder on Drive C: ?
Activity3 (room 305 only)=> find the contents (files and folders) of the ‘Data’ folder that’s inside ‘Packages’ folder that’s inside either ‘Winhugo’ or ‘Winnt’ folders on ‘Drive C:’
(note down how many files and folders there are)
Activity4 (any classroom) => arrange the left window of the Windows NT Explorer until only Desktop is visible (hint: make all - into + )
Example: below is an example of 'My documents' folder expanded into (-) to show sub-folders
